Trek Grade
Easy-Moderate
Suitable For
8 years and above
Highest Altitude
12,185 ft
Base Camp
Manali (Sarsai), Himachal Pradesh
Trek Duration
5 days/26 km
Fitness Criteria
5 km in 38 mins
Trekking in Himachal is all about the big mountain passes. From Pin Bhaba, Rupin, Buran, Borasu to Kugti and Hampta, the list is endless. But most of them are arduous treks, demanding prior experience. Hampta is easier but comes with tricky sections and multiple river crossings.
This is where the Chandrakhani Pass Trek stands out. It is a classic high-altitude pass in Himachal. In fact, it is the only navigable pass linking the Beas and Parvati Valleys—a historic route traveled by shepherds and traders for ages. Chandrakhani even finds mention in travelogues dating back to the 1800s. It was, then, called the Malana Pass. Yet, it is the easiest of the lot we just talked about.
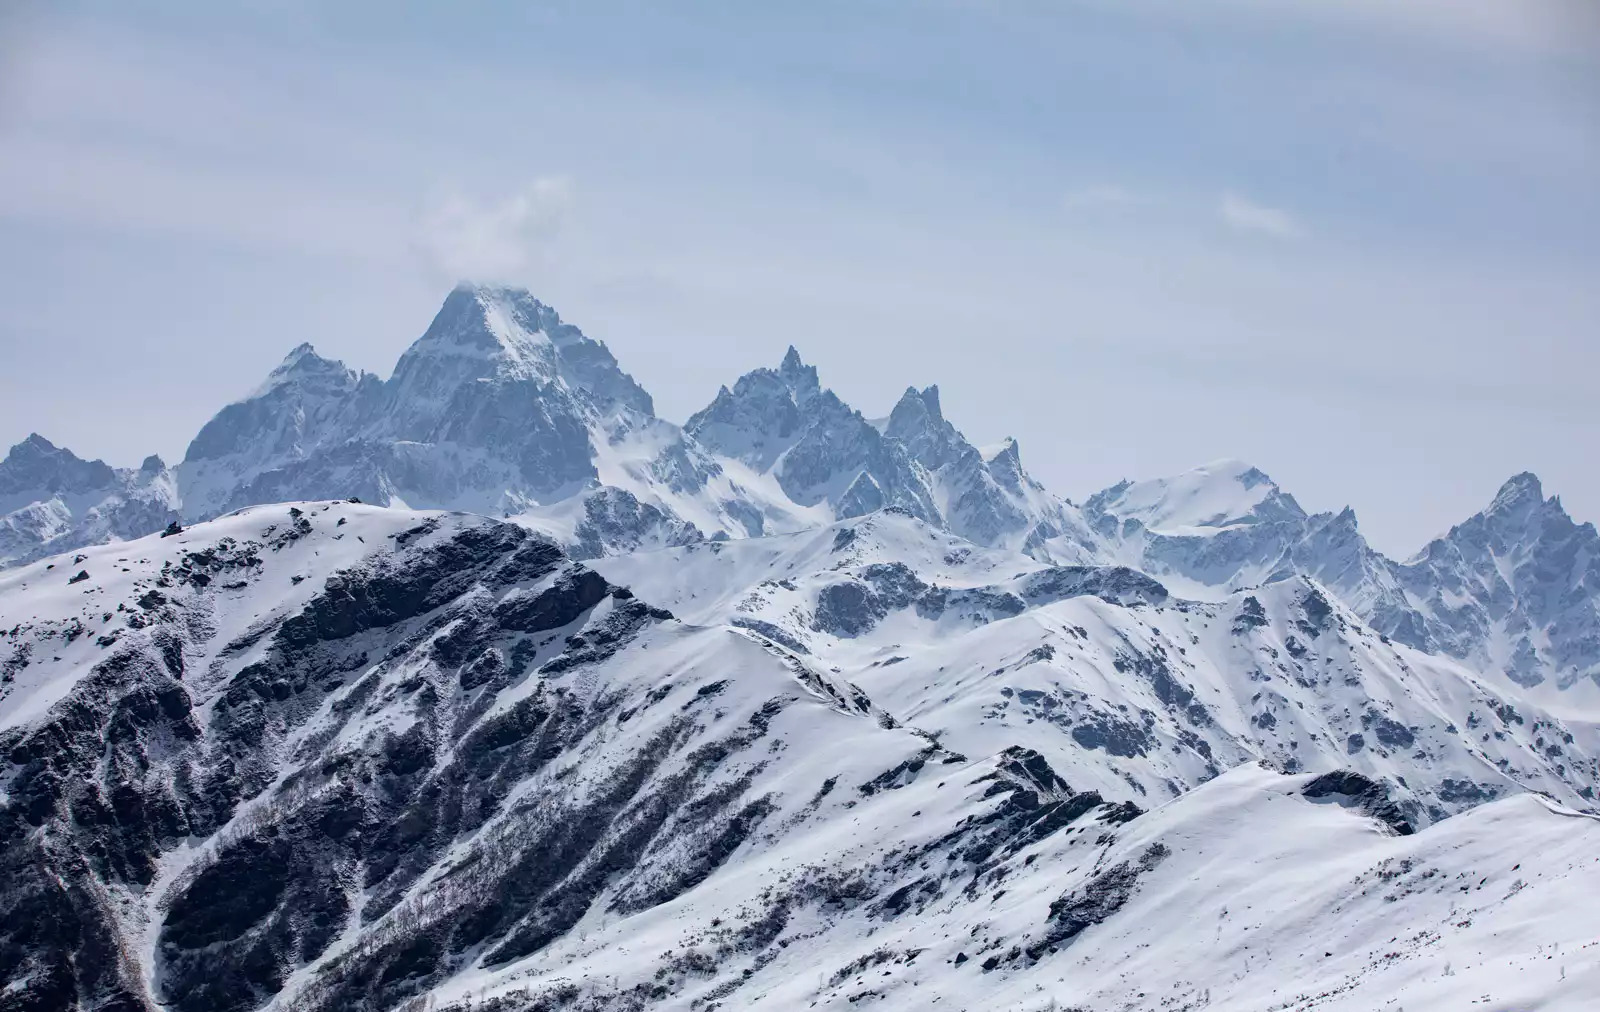
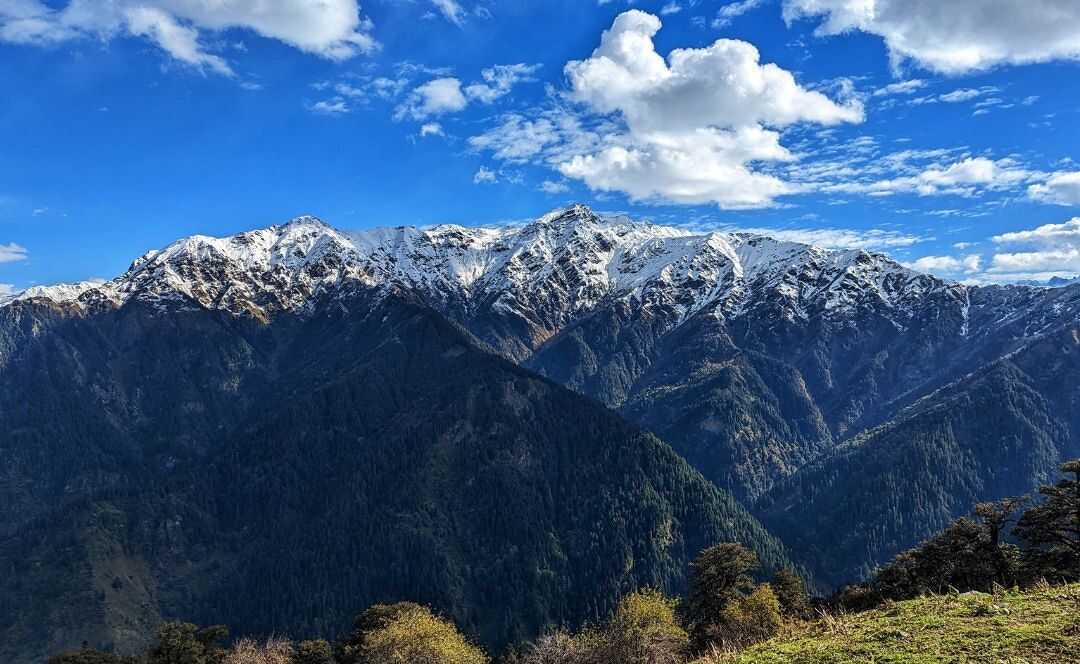
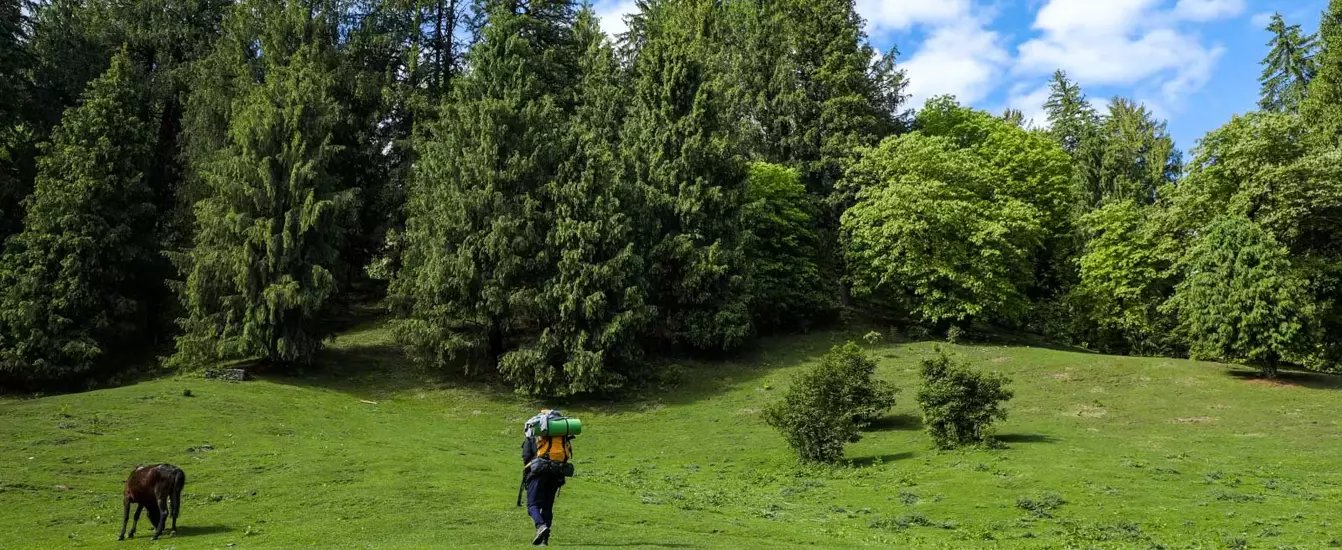
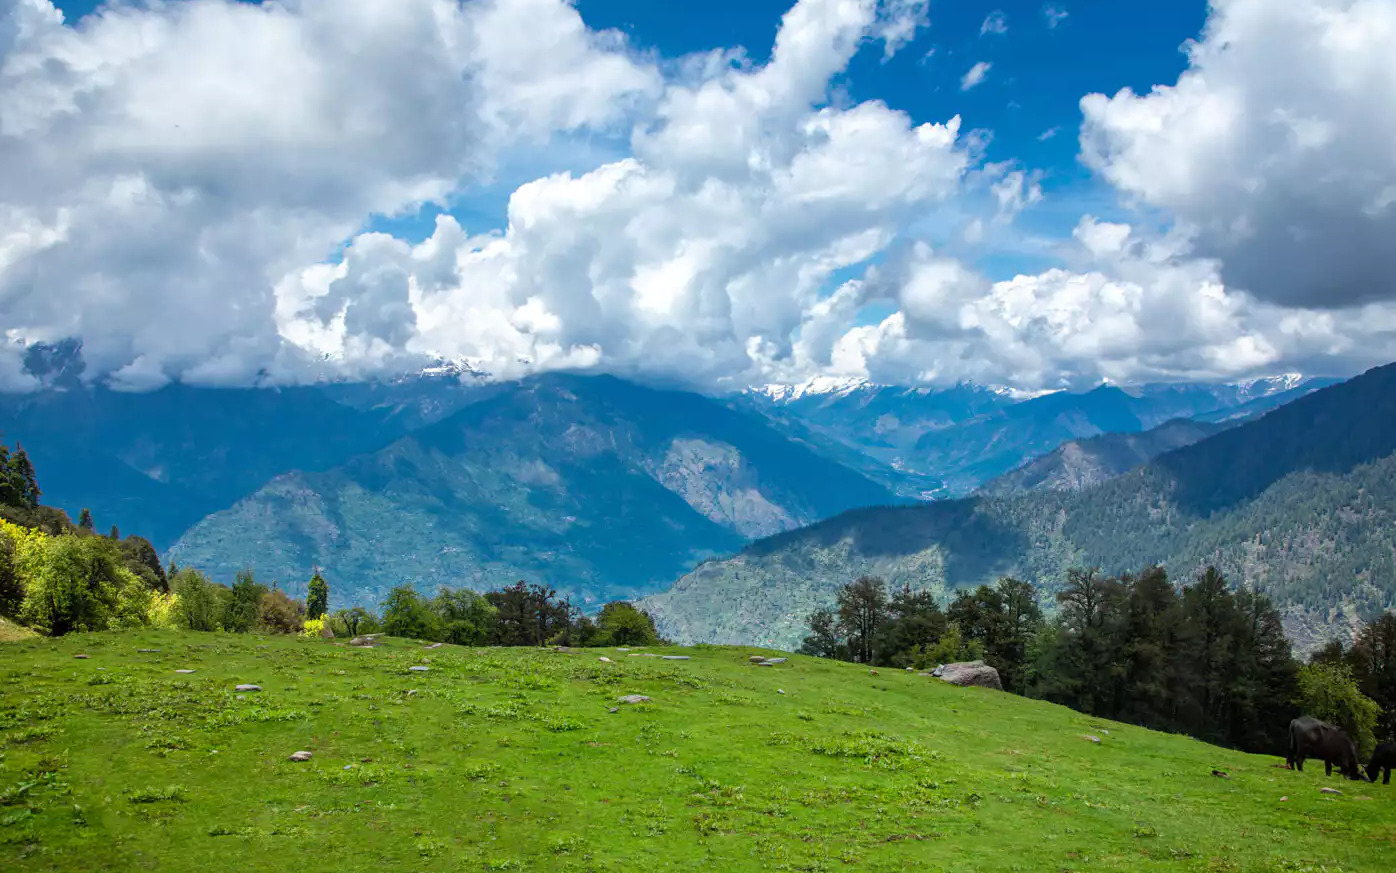
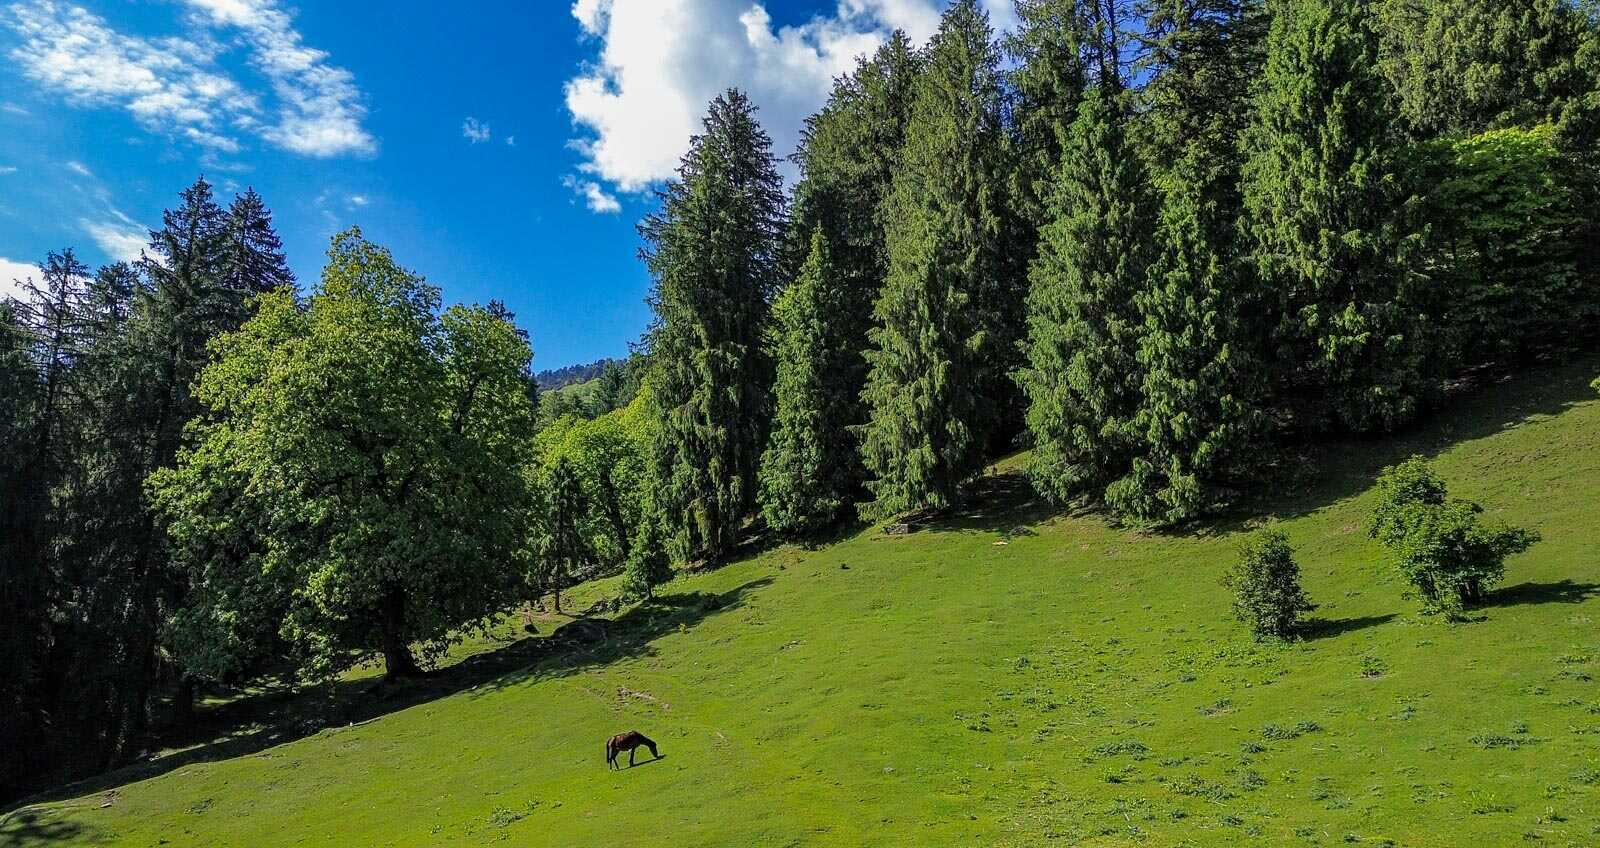
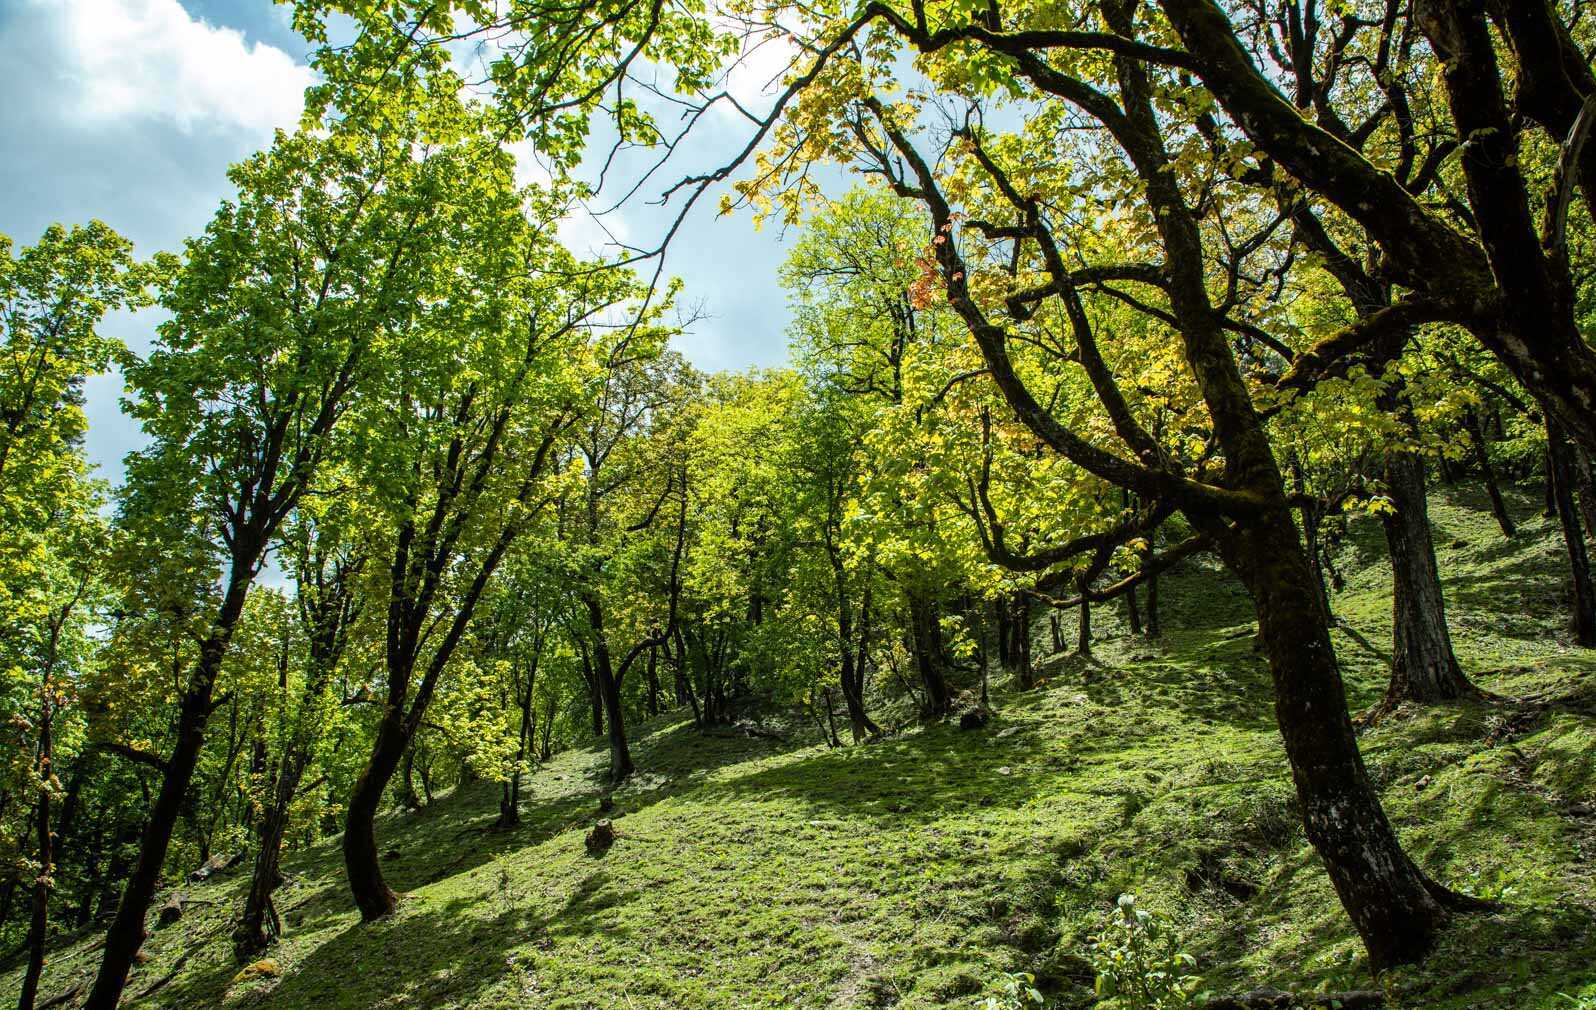
In itself, Chandrakhani Pass is a fantastic trek to do. Immediately as you start your trek from Rumsu, you enter an incredible forest section. From towering pine trees to maples, oaks and eventually rhododendrons, the variety is striking. As you climb higher, the tree line gives way to vast grasslands of the upper Kullu Valley. You begin to see the snow-capped peaks of Pir Panjal and Dhauladhar ranges. Camping on clearings amidst these forests and on the meadows of Chaklani is an experience of a lifetime. And then, ahead of Chaklani, a thrilling 2 km ridge walk from Chaklani takes you to the pass. From the ridge, on your left, you see Dhauladhar range. On your right, lies the Pir Panjal range. You see Mt Hanuman Tibba, Friendship Peak, Shikar Beh and Indrasan Peak– the iconic summits of Himachal.
The 20 km trek to Chandrakhani Pass is spread across 4 days, allowing for a gradual gain in altitude. It climbs almost immediately out of Manali, which means that accessing it is much easier than any other pass trek in Himachal. There are no difficult bouldery sections to navigate either. This is rare for a high-altitude pass in the Himalayas. Most Himalayan passes climb very high and feature long, strenuous boulder sections.
This makes Chandrakhani Pass unique. It is not only an iconic Himachali Pass with deep historical and cultural significance, but also offers all the thrills of trekking to a high-altitude Himalayan pass without throwing any technical challenge in terms of either altitude or terrain. It is no surprise that Chandrakhani has become Himachal’s most loved pass climb for beginners.
1. Easy Access from Manali The Chandrakhani Pass trek stands out for how effortlessly accessible it is from Manali. Starting at Rumsu, just an hour’s drive away, it skips the long travel days and complex logistics common to most Himachal pass treks. This easy approach makes Chandrakhani especially welcoming, particularly for those stepping into high-altitude trekking for the first time.
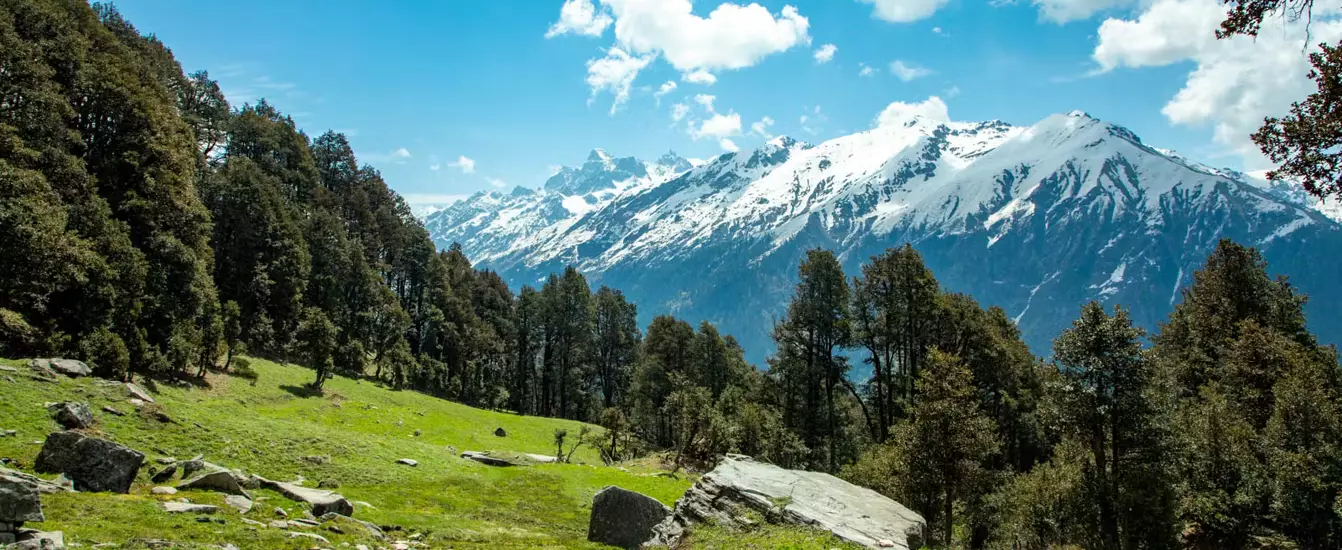
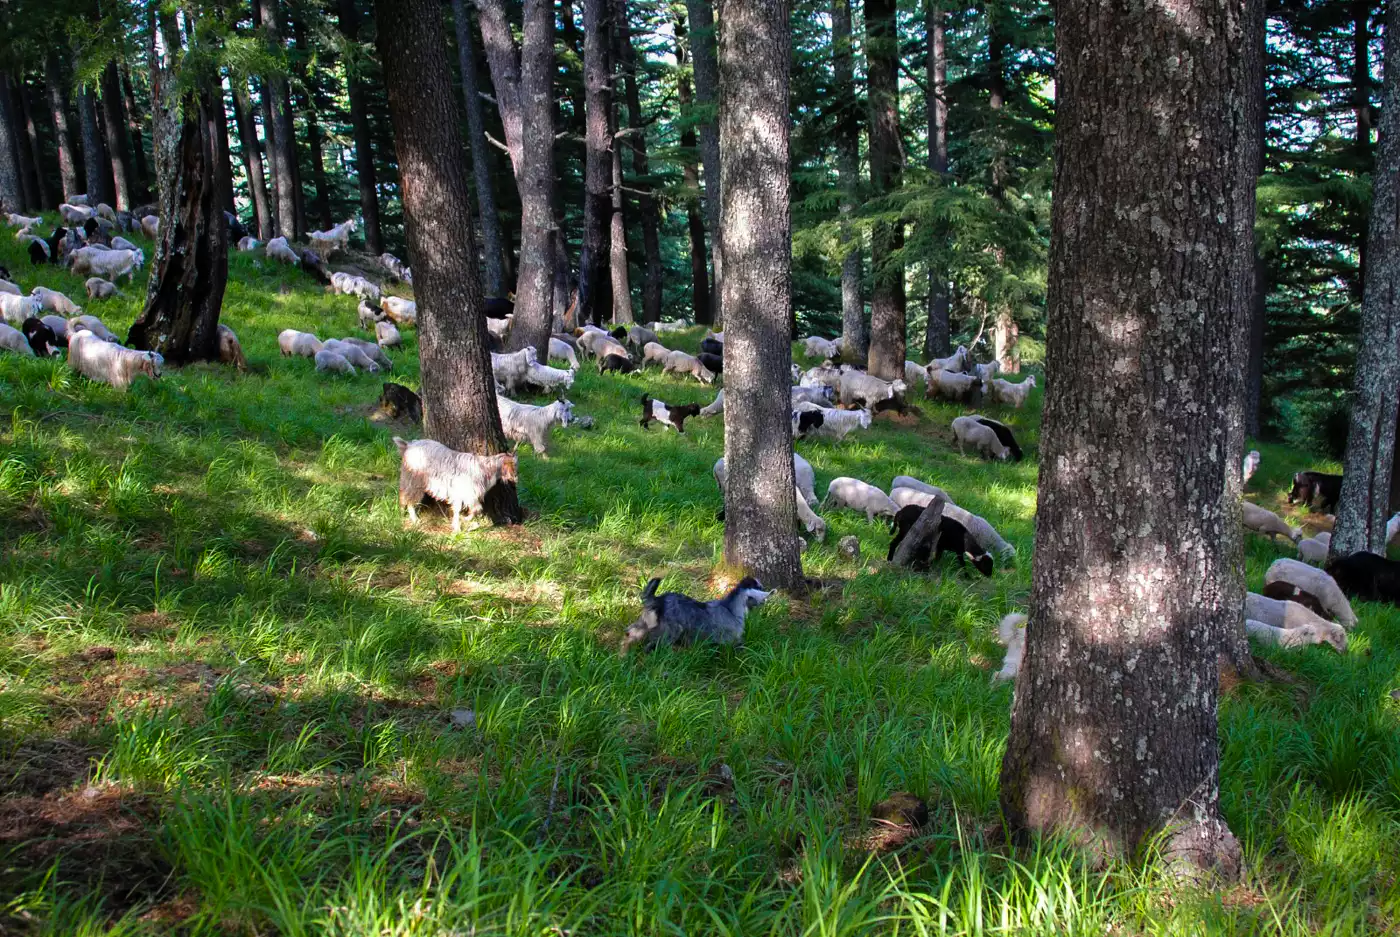
2. The Magical Forest Trail The trek opens inside a dense, magical forest. From the moment you leave Rumsu village, towering pines, deodar, and maple trees surround you. Cool shade, birdsong, and the earthy scent of wood create a deeply calming atmosphere. As you gain altitude, the forest slowly transforms. Bright rhododendron trees begin to dominate the trail. Between Naya Tapru and Chaklani, they splash the landscape with colour. The final descent through lush woodland on the other side of the pass offers a gentle, satisfying close to the trek.
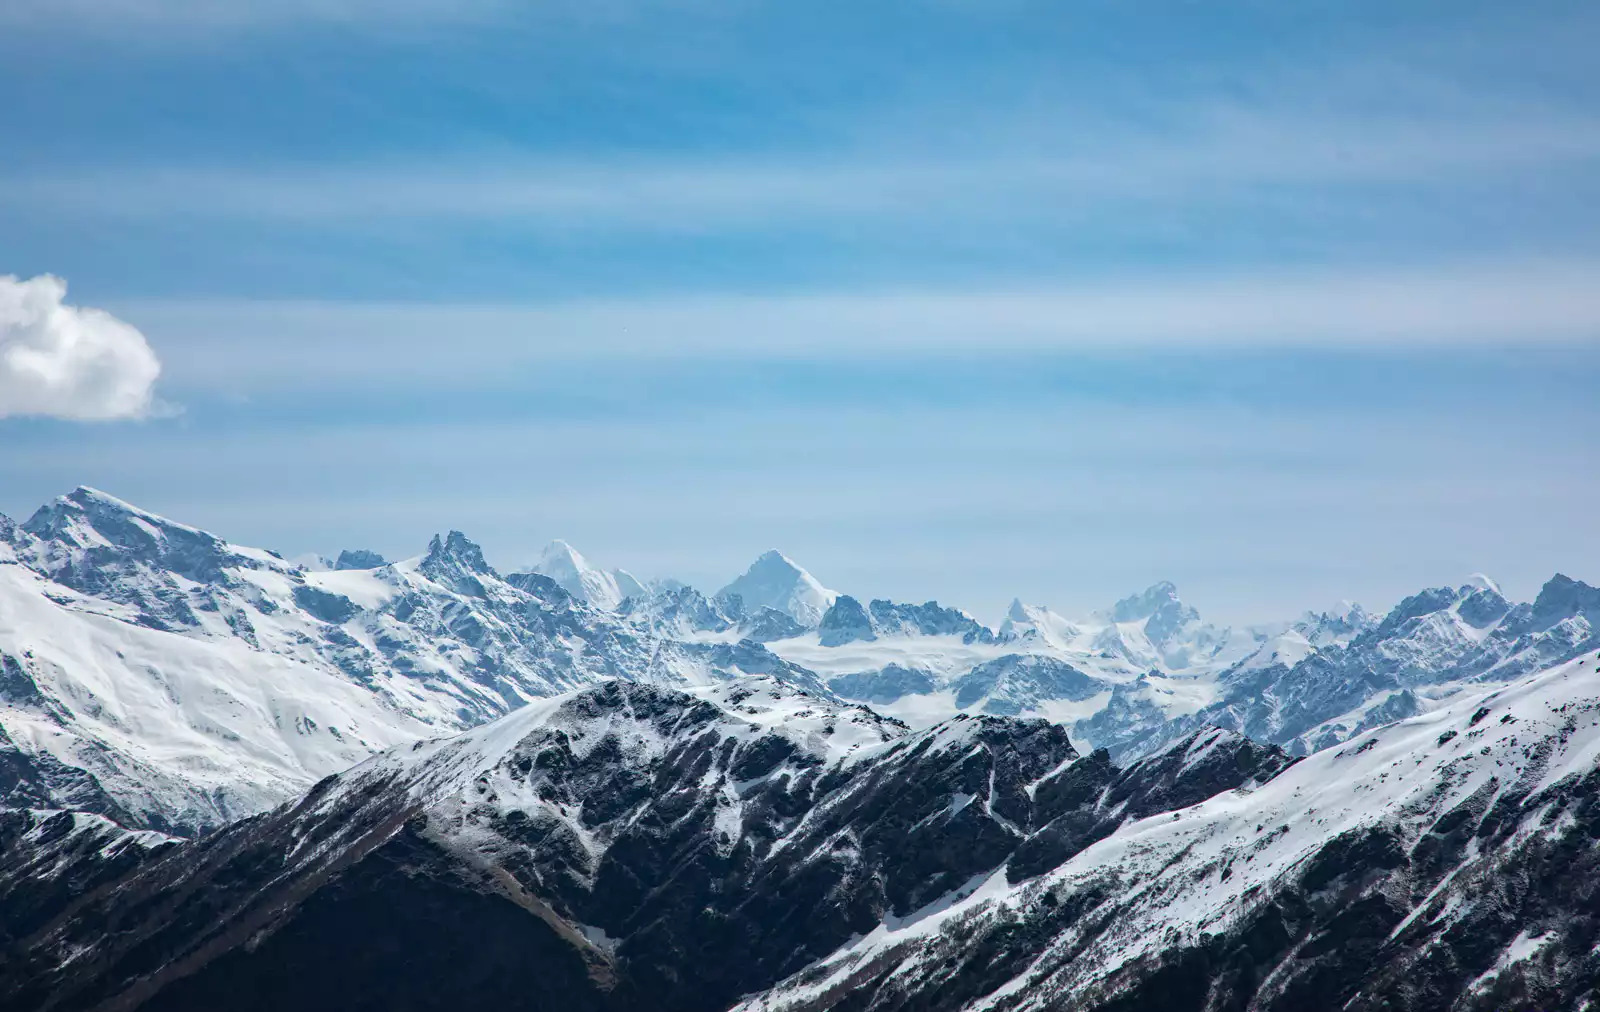
3. Spectacular Mountain Views The trek is known for its breathtaking views of snow-clad peaks. From Naya Tapru itself, grand summits like Mt Hanuman Tibba, Friendship Peak, and Indrasan Peak come into view. On summit day, as you walk the narrow ridge leading to Chandrakhani Pass, the scenery turns truly spectacular. The Dhauladhar range towers on one side, while the Pir Panjal and Parvati ranges unfold on the other. Standing at the pass, with mountains rising in every direction, feels nothing short of magical.
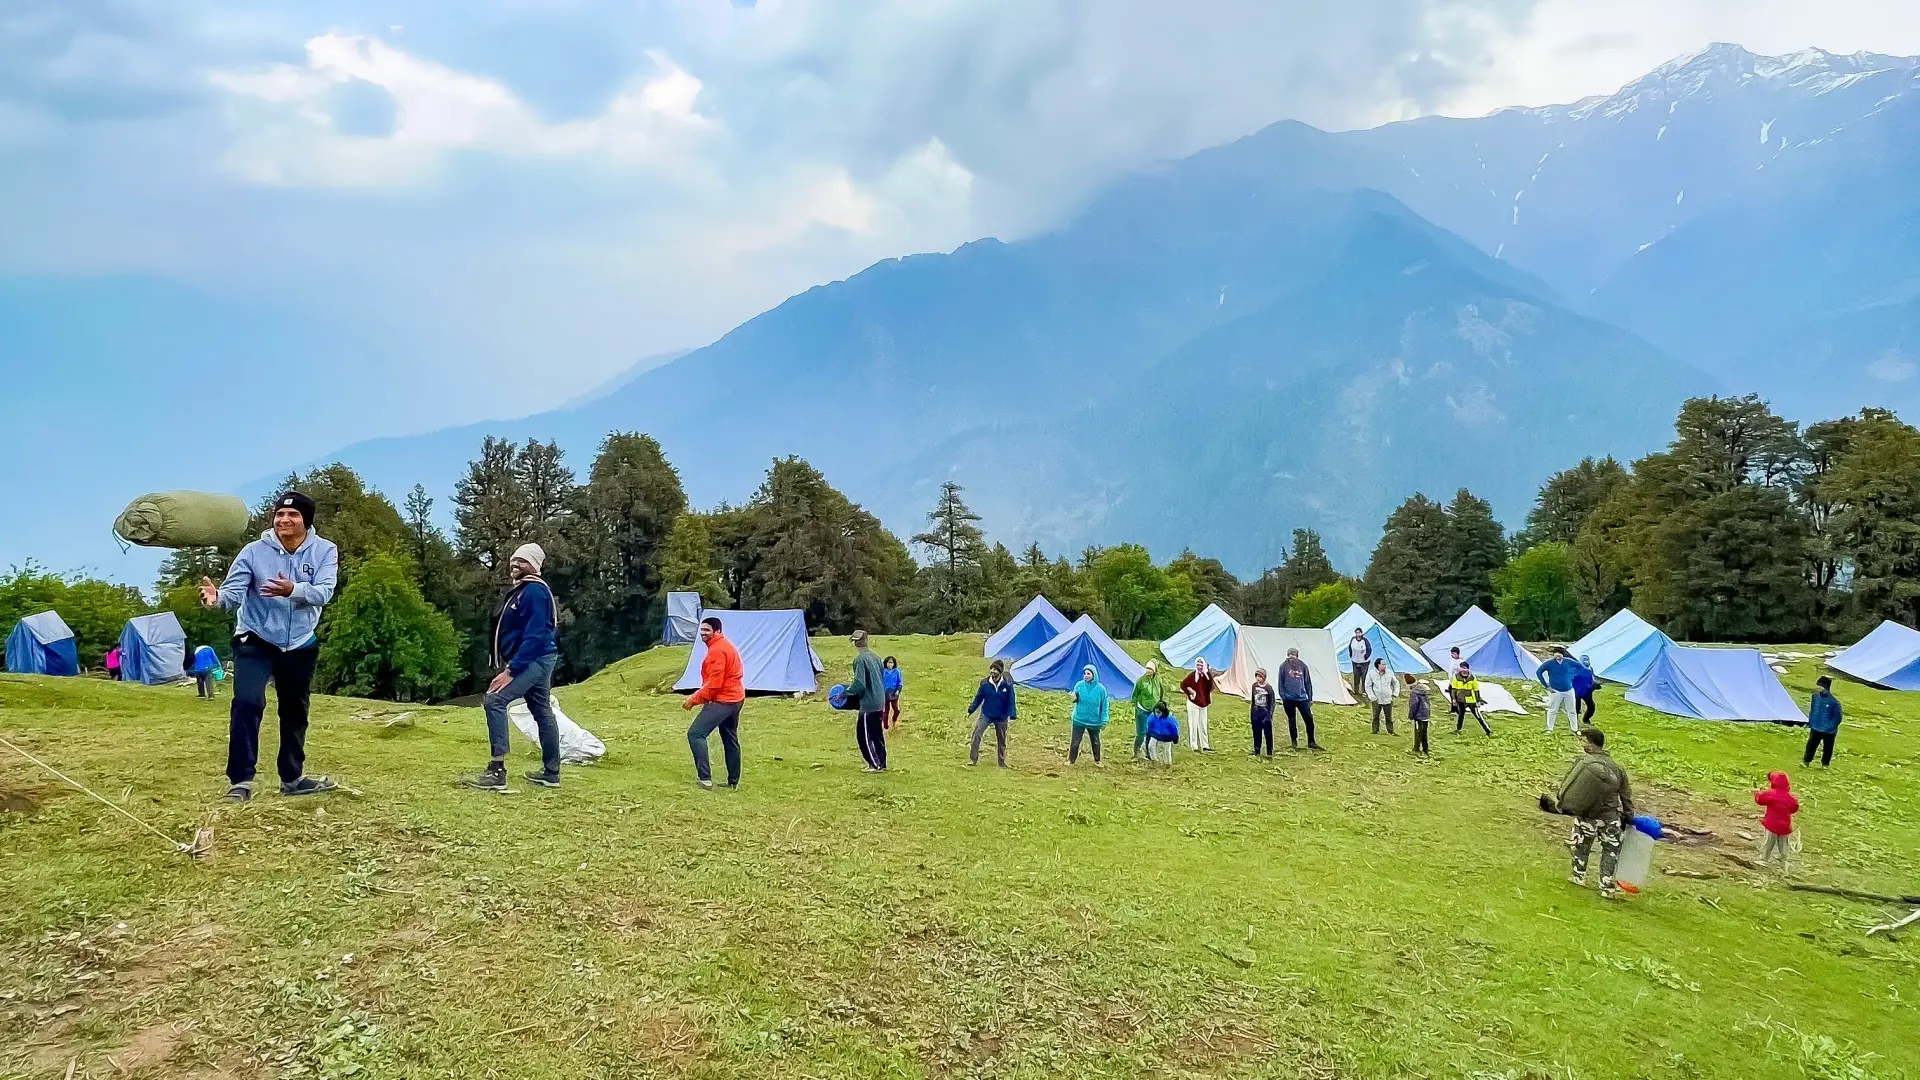
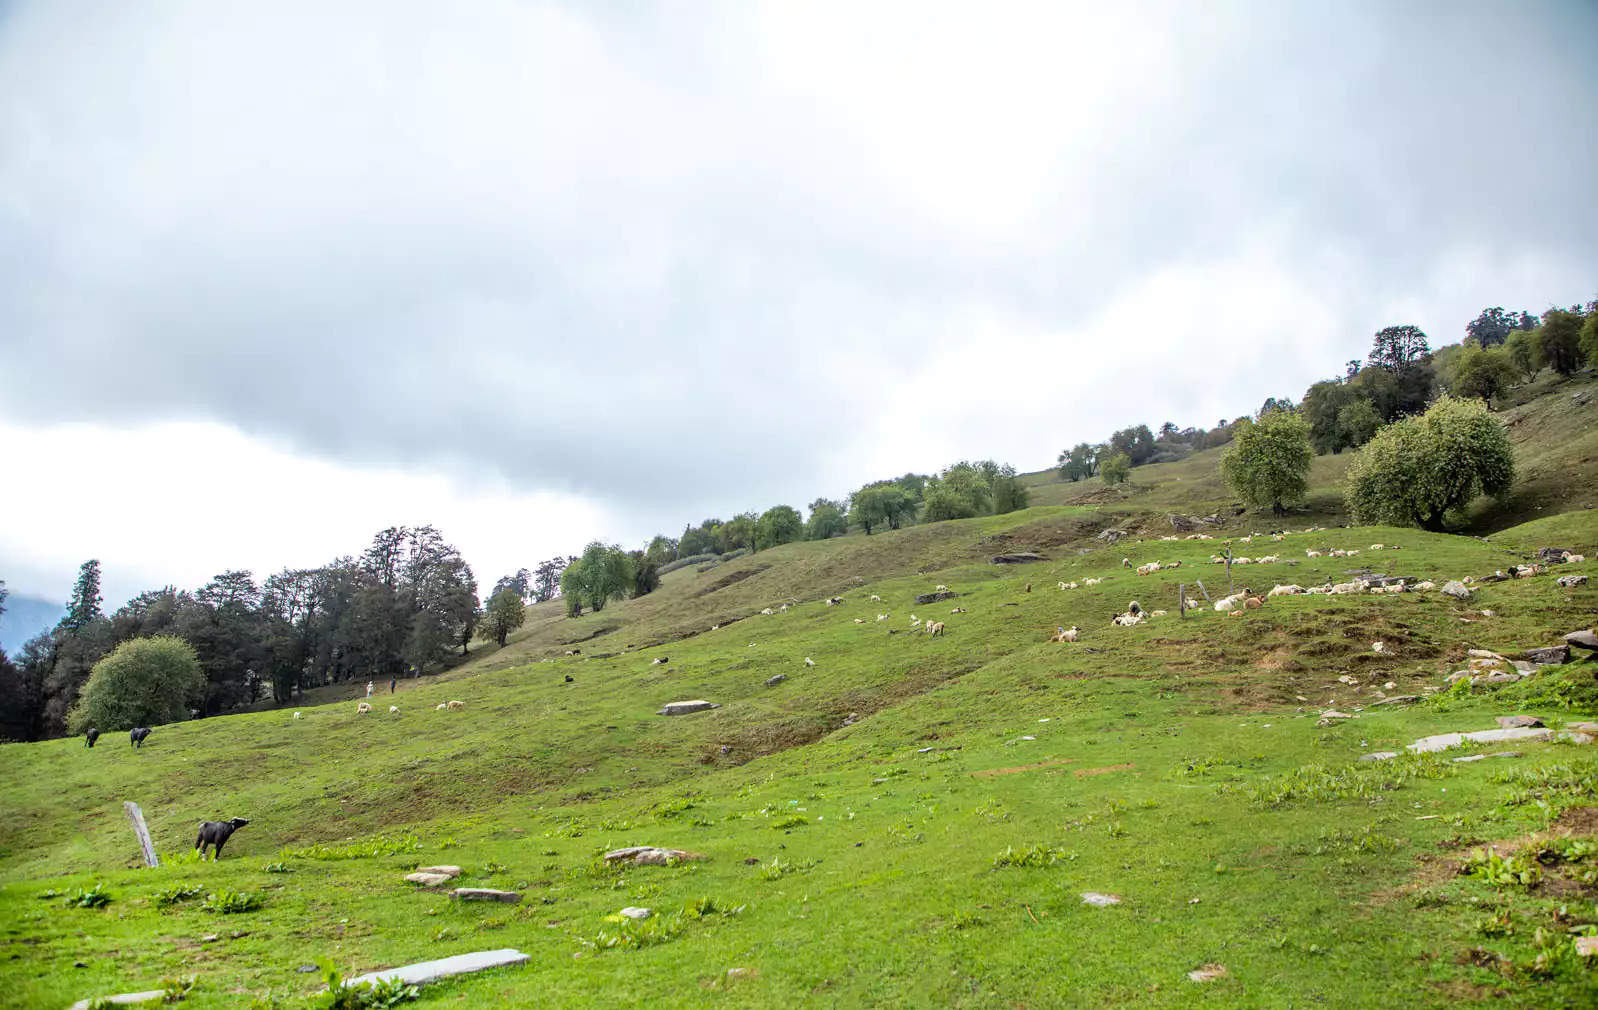
4. Wide Clearings and Meadows The Chandrakhani Pass Trek is a delight for lovers of wide, open landscapes. The trail is dotted with expansive clearings, ideal for camping and absorbing the surrounding beauty. The largest of these, Naya Tapru, stretches over 1.5 km and rewards trekkers with sweeping views of snow-clad peaks and villages far below. In July and August, the trek transforms into a burst of colour as wildflowers blanket the meadows and hillsides. The sheer diversity and abundance of blooms give it the feel of Himachal’s own Valley of Flowers. Even when clouds hide the mountains, the vibrant meadows hold your attention. To witness this floral spectacle, plan your trek during the monsoon—gentle afternoon showers only enhance the experience.
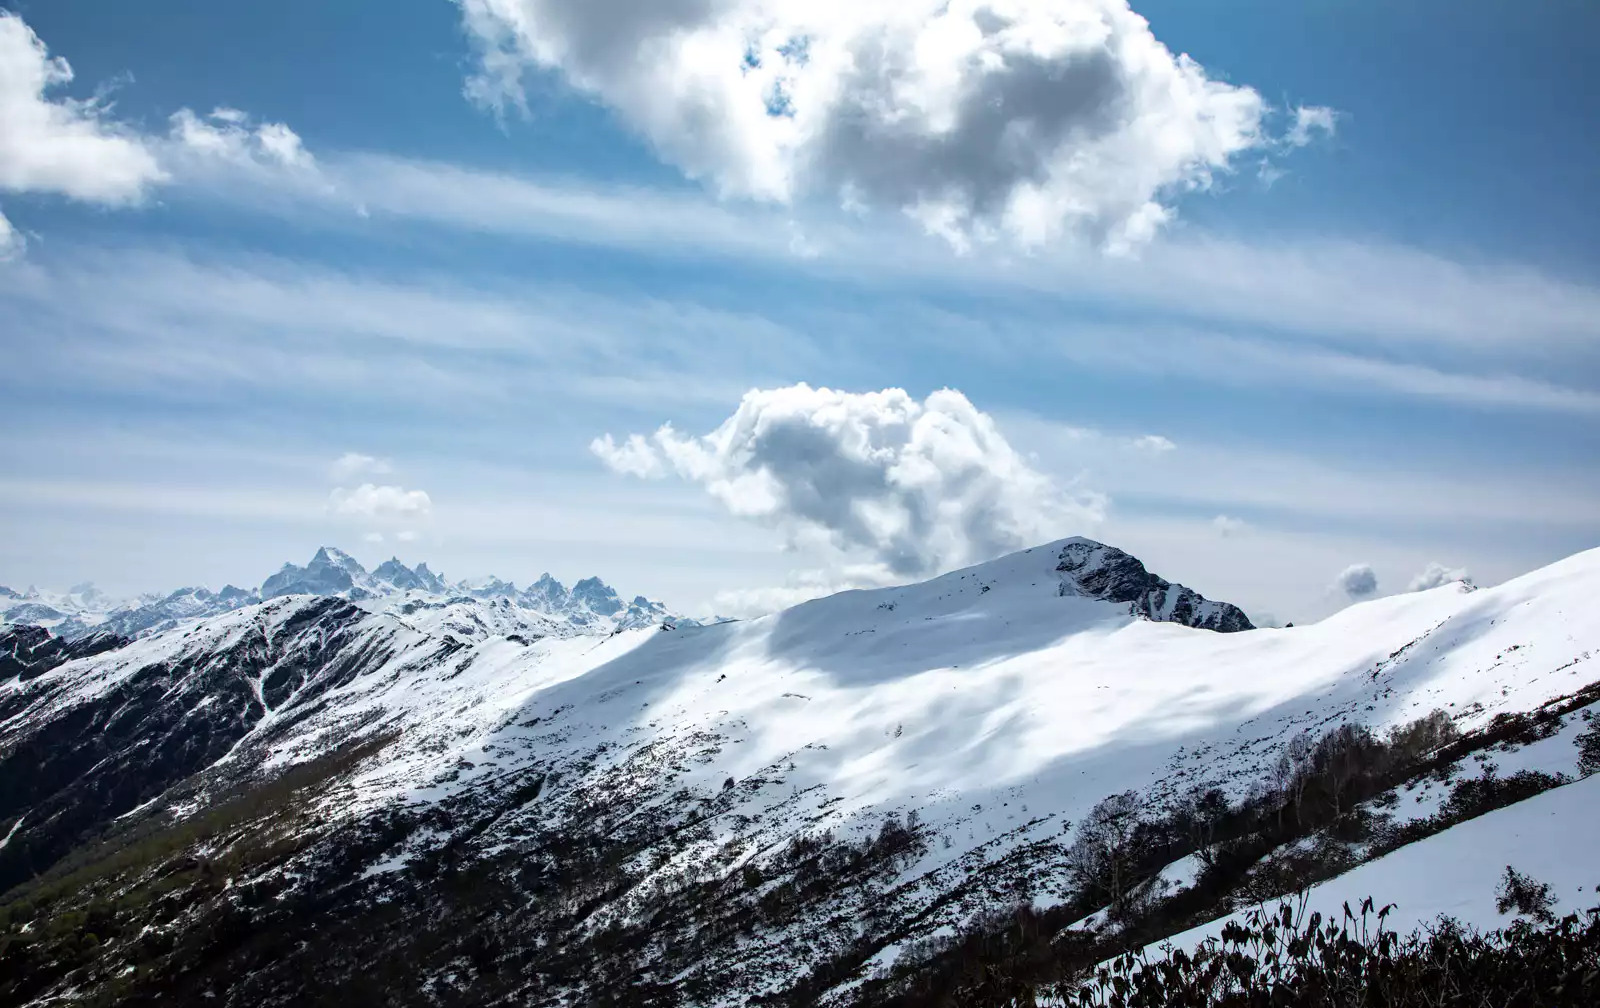
5. The Thrill of the Ridge Walk The final 2-km ridge walk to Chandrakhani Pass is both thrilling and unforgettable. Walking along the narrow trail, with dramatic views dropping away on either side, fills you with a strong sense of adventure. The gusting wind heightens the excitement as you move closer to the pass, where a sweeping 180° panorama of mountains and valleys awaits as your reward.
At Himachal Tripper, we believe trekkers should be well-informed before setting out on a Himalayan journey. The right knowledge is what separates a safe trek from a risky one. It also shapes the difference between a deeply enriching experience and a surface-level adventure.
Use this section to understand the Chandrakhani Pass trek in detail. It offers day-by-day insights, what to expect on the trail, and how to prepare for the journey. Years of trekking experience have shaped this information, making it highly practical and valuable for trekkers.
Reporting Time: 3 pm | Location: Beas Bridge, Manali
Pick-up will be arranged from Beas Bridge, Manali to Indiahikes Jungle Line Campus at 3 pm.
Note: The cost is ₹300 (additional 5% GST) per trekker one way from Manali (Beas Bridge) to Indiahikes Jungle Line Campus (₹600 for both onward and return journeys). These are non-AC vehicles. Please pre-book your transport through the dashboard before your trek.
Drive Distance: 9 km | Drive Duration: 25 minutes | Trek Distance: 3 km | Trek Duration: 3 hours | Altitude Gain: 6,745 ft to 8,930 ft
You will take a shared cab from the Himachal Tripper Campus to Rumsu. The cost of this ride is included in the trek fee.
Trek Distance: 4 km | Altitude Gain: 8,930 ft to 11,368 ft | Trek Duration: 4 hrs
Trek Distance: 9.5 km | Trek Duration: 10 hrs | Altitude Gain/Loss: 11,368 ft to 10,430 ft via 12,185 ft
Drive Distance: 9 km | Trek Distance: 4.8 km | Altitude Loss: 10,430 ft to 6,745 ft | Trek Duration: 5 hrs | Drive Duration: 25 minutes
Note: The cost is ₹300 (plus 5% GST) per trekker for a one-way trip to Manali (Beas Bridge) from the Himachal Tripper Jungle Line Campus (₹600 for both onward and return journeys). These are non-AC vehicles. Please pre-book your transport through your dashboard before the trek.
The process of registration, health screening, and document verification will take place alongside the collection of your rental gear.
You will stay overnight at our Manali Campus. The next day, the team will depart at 7 AM and drive to Rumsu, a journey of approximately one hour.
Drive Distance: 9 km | Trek Distance: 3 km | Drive Duration: 25 minutes | Trek Duration: 3 hrs | Altitude Gain: 6,745 ft to 8,930 ft
The trek begins from Rumsu village. You’ll start early from the Himachal Tripper Manali Campus to reach this village, located about 9 km away—a drive of roughly half an hour. The houses here reflect the traditional Kathkuni architecture, similar to what you see in Jiskun on the Rupin Pass trek. Rumsu is well connected to Nagar and Malana, and the villagers worship the same deity as in Malana. The local culture and practices are closely intertwined, giving a glimpse of the region’s unique traditions.
Leave Rumsu village and enter the forest trail, a mixed woodland of deodar, pine, and walnut trees. The forest is dense, and the trail gradually ascends through it. After roughly an hour and a half of climbing, you reach a small clearing called Stiling—your first rest point. A small stream flows nearby, so this is a good spot to refill your water bottles.
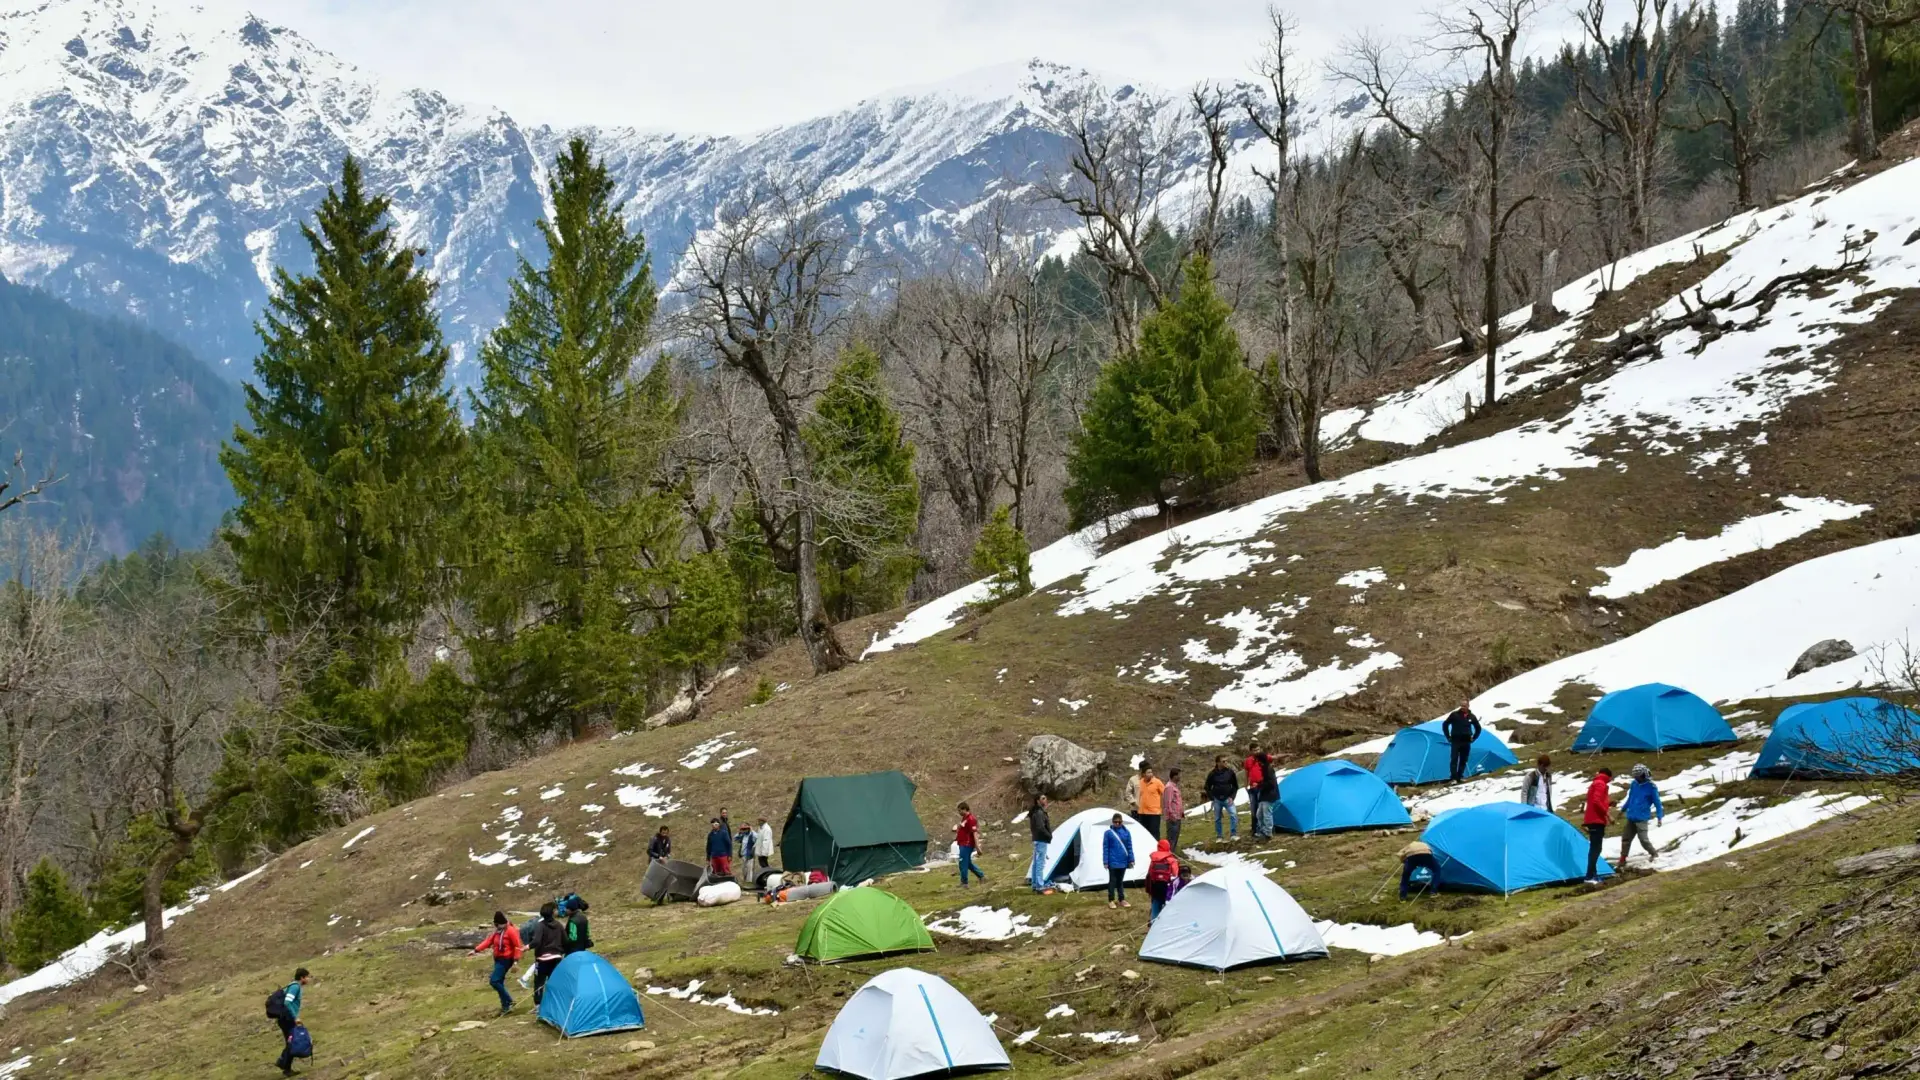
After about 20 minutes of gradual ascent along the forest trail, you reach another clearing called Ghan Kuradi. This scenic spot, surrounded by pine, deodar, rai, maple, chestnut, and green and yellow oaks, offers stunning views of the Kullu Valley. This is where you’ll set up camp for the day. With a water source nearby, it’s also an ideal camping spot for DIY trekkers.
On a clear day, the surrounding peaks—Hanuman Tibba, Shikar Beh, and Mukar Beh—come into full view, adding to the beauty of the campsite.
Trek Distance: 4 km | Trek Duration: 4 hrs | Altitude Gain: 8,930 ft to 11,368 ft
From Ghan Kuradi, a series of three short climbs takes you to Naya Tapru. This used to be an older campsite, but due to a shortage of water, it is no longer used for overnight stays.
As you continue your gradual ascent along the mixed forest trail, the valley begins to unfold behind you. In about an hour, you reach Naya Tapru, a vast clearing that offers sweeping views of the surrounding villages and majestic snow-clad peaks.
The trail goes in the South-East direction from Naya Tapru.
From Naya Tapru to Chaklani, ascend in the zig zag trail. The trail is not very steep. As the treeline gets sparse, you start getting a wider view of the surroundings. This trail is dominated by rhododendron trees.
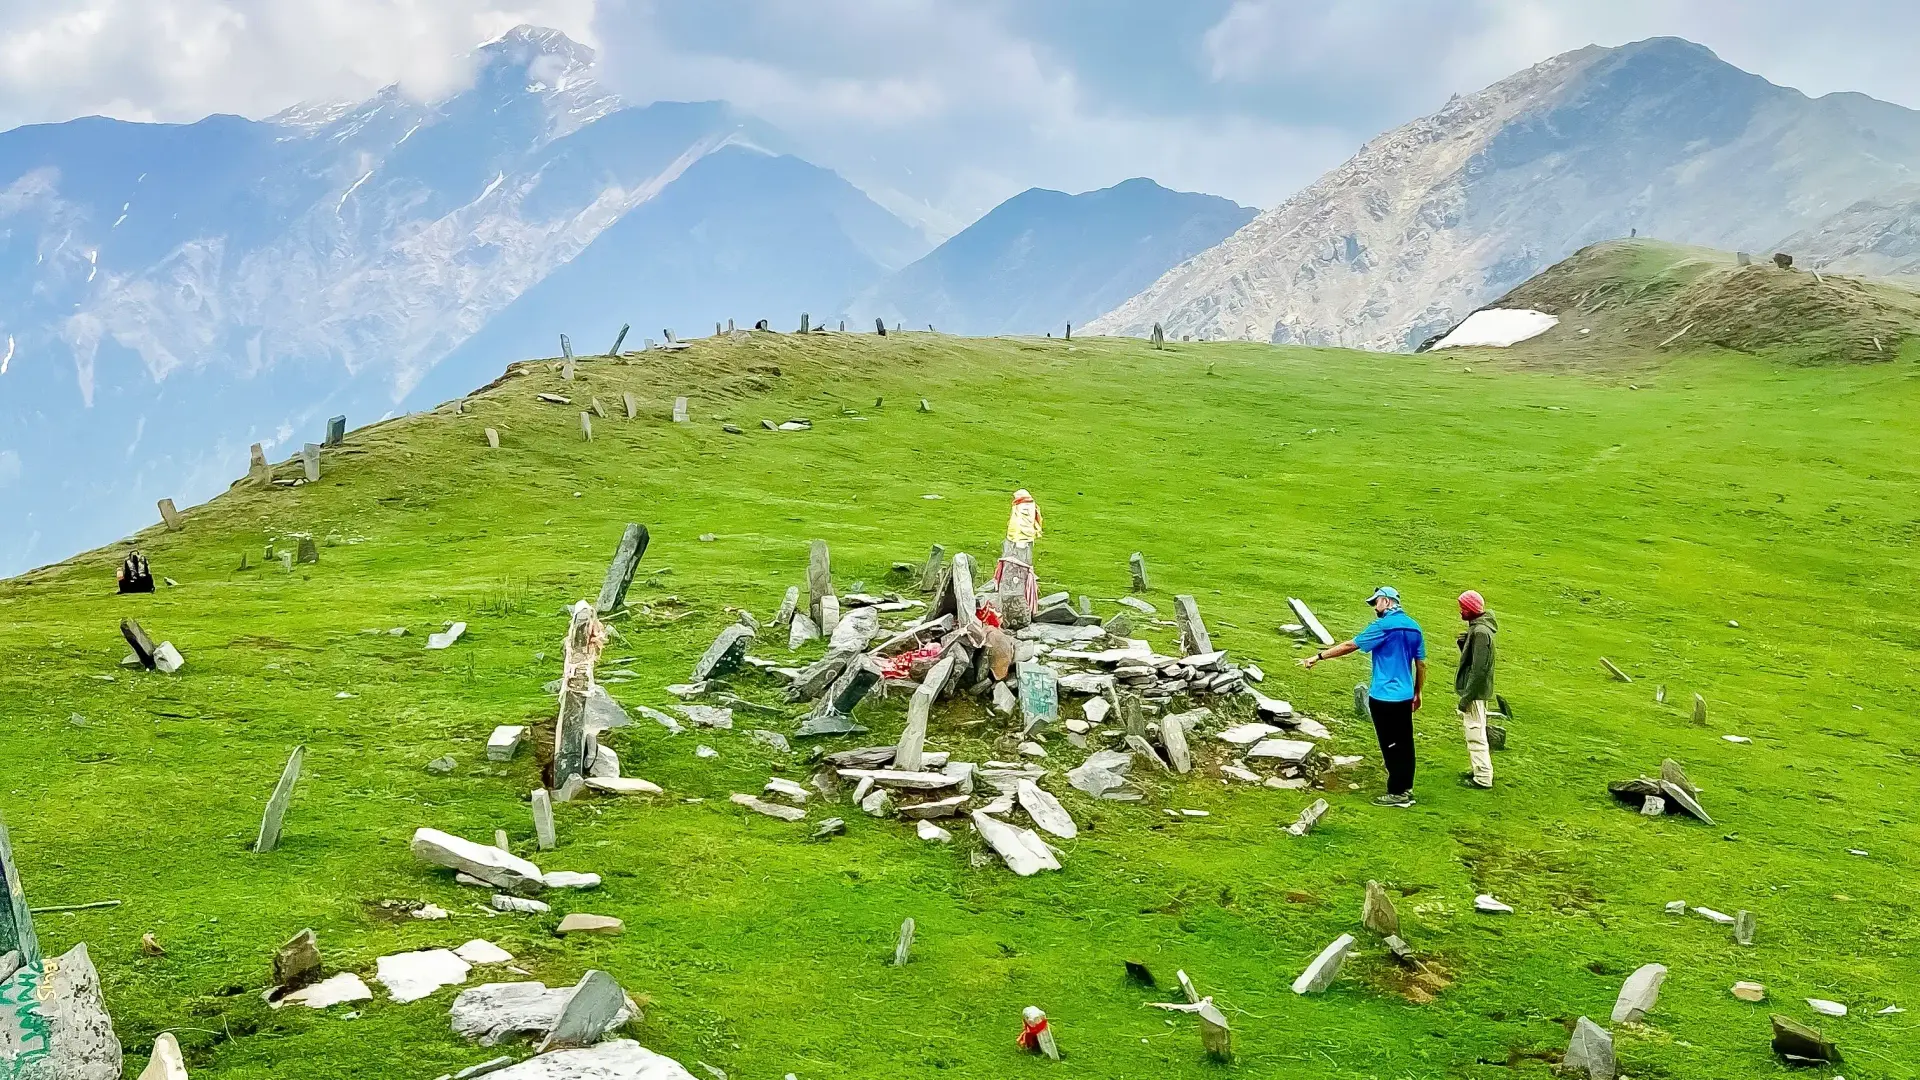
You see a mountain ridge in the South-East direction behind which is the Chandrakhani Pass. In about 2.5 hours from Naya Tapru, you reach the second campsite, Chaklani.
Chaklani is a small clearing located at an altitude of 11,368 ft. Next to the campsite, there is a small water stream. Explore around a bit. Rest well as tomorrow will be a long day.
Trek Distance: 9.5 km | Trek Duration: 10 hrs | Altitude Gain/Loss: 11,368 ft to 10,430 ft via 12,185 ft
Today is the most adventurous day of the trek, as you make your way to the highest point of Chandrakhani Pass!
Note: Refill your water bottles before starting the trek, as there are no water sources until you return to the campsite.
From Chaklani, the trail heads diagonally southeast, gradually gaining altitude as you climb to the highest point of the trek: Chandrakhani Pass. The ascent from Chaklani takes about an hour and a half. Once at the pass, there’s nearly a kilometre of ridge walking to reach the absolute highest point. This ridge walk is what sets Chandrakhani apart from many other Himalayan pass treks.
From the ridge, the Dhauladhar range rises majestically on your left, while the Pir Panjal range stretches on your right, merging into the Parvati range. Peaks like Mt Hanuman Tibba, Friendship Peak, Shikar Beh, and Indrasan Peak come into view, along with many others. Beyond the snow-capped mountains, the rolling, forested hills of the Kullu Valley unfold in a sweeping panorama. You can also spot the villages of Kullu and Manali in the distance, adding to the breathtaking beauty of this spot.
After soaking in the views from the highest point, you begin your descent back to Naya Tapru.
From here, it’s a long descent of about 6 km to reach Naya Tapru Campsite. You pass through Chaklani, where you can refill your water bottles. Along the way, you get to enjoy the open grasslands again and spend some more time wandering through the rhododendron forests. Rest well at Naya Tapru for the night.
Trek Distance: 4.8 km | Drive Duration: 5 hrs | Altitude Loss: 10,430 ft to 6,745 ft
On the return, you follow the same route as Day 2. After refilling your water bottles, begin by descending the three steep sections near Naya Tapru campsite. Soon, you’ll enter the forested stretch of Ghan Kuradi, and later reach Stiling clearing for a short rest. Continue through the dense forests of deodar, pine, and walnut trees until you finally arrive at Rumsu.
Drive back to our campus, enjoy lunch, return your rental gear, and collect your cloakroom luggage.
Drive back to Manali on the same day.
You will cover a total of around 26 km in four trekking days during which you will gain approximately 5,440 ft (6,745 ft to 12,185 ft). Every day will include ascents and descents on uneven trails.
Please note: If you are trekking with Indiahikes, our Trek Leaders and Technical Guides will provide you with all necessary guidance, support, and technical gear such as micro spikes, gaiters, helmets, ropes, etc. wherever required.
Please note: The safety of our trekkers is paramount. Our technical team, in conjunction with the Trek Leader, constantly monitors the weather conditions and makes informed decisions about proceeding with or aborting the trek. If the weather deteriorates, the team may need to turn back from any campsite to ensure the safety of all trekkers.
Please Note: The Himachal Tripper team is equipped with high-altitude medical kits, oxygen cylinders, and stretchers to handle any altitude-related emergencies.
The medical facilities at Manali, just 27 km from Rumsu, are your best bet in case of sudden medical emergencies on the Chandrakhani Pass Trek. In case of a more serious medical issue, the best option is to access medical facilities at Chandigarh, a 6-hr drive from Manali.
The Himachal Tripper team will ensure your safety throughout the journey. However, we believe that safety is a shared responsibility. We need your active participation and attention to safety protocols to ensure a safe and successful trek.
Please inform your Trek Leader about any pre-existing medical conditions or health concerns, no matter how minor they may seem. This will enable us to take the necessary precautions and ensure your safety throughout the trek.
The Chandrakhani Pass Trek can be done for almost five months in the year. The very best time to do this trek is between May and September. You may extend it till October.
During other months of the year, the snow is too high for a comfortable pass-crossing.
Day time: Between 15 °C and 20 °C | Night time: Will drop to temperatures between 1 °C and 5 °C
Presence of snow: Despite it being summers, expect snow patches on the ground. Especially close to Chaklani and above it is still snow bound
No. of warm layers required: 3 warm layers
In June expect a lot of snow from Chaklani onward. You will find good snow slightly after Chaklani camp right until the pass. You’ll get snow even until you get down on the other side of the pass. The depth of snow on both sides is quite high.
Day time: Between 15 °C and 20 °C | Night time: Will drop to temperatures between 1 °C and 5 °C
Presence of snow: Snow starts to melt as we enter July. By August most of the snow is gone, except for some patches near Chandrakhani Pass
No. of warm layers required: 3 warm layers
In July the snow starts to melt rapidly but stays in good patches on the higher reaches of the pass. But different magic starts to unfold from mid-July onward.
The valley starts to get its first monsoon showers. Wildflowers begin to sprout in the entire green belt on the Kullu side. Sometimes trekkers have to wade through a bed of wildflowers on either side of the trail.
If there is a favourite time to do the trek, then mid-July to the end of August is the best time to do the Chandrakhani Pass trek. The grasslands are a vibrant green. The slopes are alive with swaying wildflowers. On the other hand, the skies are generally cloudy though. Be game for good showers on the trek. The rains last until the mid of September.
Day time: Between 12 °C and 15 °C | Night time: Will drop to temperatures between 0 °C and 3 °C
Presence of snow: You will not find snow in the month of September on the trail
No. of warm layers required: 4 warm layers
Post-mid-September, the skies start to clear up and the early autumn colours strike the slopes. The Chandrakhani Pass is at its most colourful. The sunrises and sunsets are gorgeous, the snow-clad mountains stand tall against the deep blue skies. The trek is at its most perfect.
At Himachal Tripper, we conclude the Chandrakhani Pass trekking season at the end of September.
By the first week of October, the air turns noticeably nippier, bringing the first hints of winter chill. Night temperatures drop below zero at most camps, and higher camps can feel bitterly cold. Streams begin to dry up, making water sources scarce. The landscape takes on a more muted tone—the earth browns, and the boulders appear starker against the fading greenery.
Yes, monsoon treks are generally safe. At Himachal Tripper, we run only those treks during the monsoon that are safely navigable in the rains.
We monitor weather patterns and trail conditions closely every day. In unforeseen situations, we take all necessary actions—whether rerouting, rescheduling, or even cancelling the trek if needed—always keeping your safety as our top priority.
That said, the monsoon has its own moods—not just on the trails, but also on the way there. Landslides and roadblocks are more common during this season, often causing traffic jams and delays en route to the base camp. It can be frustrating to miss out on a beautiful experience simply because of obstacles on the journey.
So we always recommend two things:
* Reach your pickup town a day earlier if possible. It gives you a buffer against unpredictable road conditions.
* Keep a buffer day after your trek before you plan your return journey. The mountains can often move at their own pace.
Trekking in the monsoon is magical. The forests are lush, the streams are full, and the trails come alive. But to truly enjoy it, give yourself a little breathing room. A little extra time can make all the difference between a stressful journey and a memorable adventure.
Himachal Tripper Jungle Line Campus in Manali serves as the base camp for the Chandrakhani Pass trek. Located in the peaceful hamlet of Sarsai, it lies approximately 15 km away from the lively town center of Manali, offering a calm and scenic starting point for the adventure.
You must arrive at the Himachal Tripper Jungle Line Campus in Manali by 4:00 PM on Day 1 of your trek to ensure a smooth start to the journey.
In both situations, we strongly advise reaching Manali on Day Zero, which is one day prior to Day 1 of the trek itinerary. For instance, if your trek begins on 25th August, plan to arrive in Manali by 24th August. This extra day acts as a buffer for any unforeseen travel delays and ensures you are well-rested before the trek begins.
Manali is well-connected by road from Delhi and Chandigarh. However, the section of NH-3 beyond Mandi is susceptible to landslides, which can sometimes cause travel delays. It’s advisable to factor this into your travel plans while heading to Manali.
The easiest way to reach the Manali is to:
1. Fly to Delhi, take a direct bus from ISBT Kashmere Gate to Manali
2. Fly to Chandigarh, take a direct bus from Chandigarh to Manali.
| Flight Options | Travel Instructions |
|---|---|
| Fly to Chandigarh |
|
| Fly to Delhi |
|
Pro Tip: If the flights to Chandigarh are too costly, fly to Delhi and take the overnight bus to Manali. Flying to Delhi may be a lot cheaper than getting to Chandigarh. However, If you notice the difference in air ticket prices between Delhi and Chandigarh is less than Rs 1000, then book for Chandigarh. The rest and shorter travel time are worth the difference.
From Manali-
Sarsai is located about 15 km from central Manali along the Kullu–Naggar–Manali Road. From the Sarsai Bus Stand, it’s just a 10–15 minute walk to reach the Himachal Tripper Jungle Line Campus.
Public Bus Timings: First bus from Manali at 7:00 AM.
Please Note: Buses from Delhi or Chandigarh drop you at the Manali Private/Volvo Bus Stand. The local bus to Sarsai leaves from the Manali Local Bus Stand, 1.5 km away. You can walk or take an auto to reach the local bus stand.
From Delhi/Chandigarh-
Option 1: Get down at Kullu and take the Local Kullu-Manali Bus to Sarsai
Option 2: Get down at 15-Mile and take a Cab to Sarsai
Secret Travel Tip: From the 15-Mile Bus Stand, a wooden bridge over the Beas River leads into the Batahar Bihal Forest. The Himachal Tripper Campus is just a 3 km scenic walk through deodar forests and apple orchards. If you visit in September or October, you’ll find the apple trees heavy with ripe fruit, adding a beautiful seasonal touch to your trek.
Before you take this hike, stop by The Cafe House for carrot cakes and trout fish grills.
If you have signed up for a trek, or are planning to, your first questions are likely the basics:
Where will I sleep? What food will I eat? What about toilets? How safe is it?
You’ve likely come here looking for answers, and we understand. We’ll guide you through exactly what to expect regarding accommodation, food, and toilet facilities during a trek with Himachal Tripper.
You’ll quickly realize that this experience is about much more than just logistics.
When you register for a trek with Himachal Tripper, you’re not just signing up for a few days in the mountains—you’re embracing a thoughtful, ethical, and sustainable outdoor experience. It reconnects you with nature, introduces you to the simplicity of minimalism, and helps you feel truly at home in the great outdoors.
Here’s everything you need to know about your camping experience on a Himachal Tripper trek—from your accommodations and the food you’ll enjoy to your sleeping arrangements and how toilets and solid waste are managed in the outdoors.
Trekkers often ask us for hotel recommendations before or after their treks. Searching through online listings can be time-consuming and confusing. That’s why, through our network of trekkers and trek leaders, we’ve curated a list of the best hotels in the major cities near our treks with Himachal Tripper.
These recommendations are tried and trusted—places we rely on for comfort, cleanliness, and convenience. Most are conveniently located near town centers and pickup points. Whether you prefer a budget-friendly stay or something a bit more premium, you’ll find options that suit your needs below.
Given below is a list of all the gear you need for the Chandrakhani Pass Trek:
If you’re missing any essential gear, you can rent high-quality items such as trekking shoes, backpacks, and jackets from the Crosstrek Rental Store by Himachal Tripper. The cost is under ₹2,000 for the entire trek. We strongly recommend renting gear, as it’s both cost-effective and environmentally friendly.
You’ll also see a small medical kit listed among the essentials. While our trek leaders carry well-stocked medical kits with 17 medicines, including life-saving drugs, it’s important that you bring your own personal medical kit as well. Although we provide BP monitors, oximeters, and canned oxygen, having your own kit ensures quick access to your medications, especially during travel.
Most importantly, you must digitally upload and carry the mandatory documents required for government permits for the trek—your ID card and medical certificate. Store them in a plastic bag to protect them in your backpack, as there are no printing or photocopying facilities at the basecamp.
The Chandrakhani Pass trek requires sturdy trekking shoes that provide good grip, ankle support, and can handle snow. Check out this quick video for tips on choosing the right trekking shoes.
| Buying Tip:The Trek series and MH series from Decathlon are excellent choices for this trek. They are tried and tested, so there’s no need to invest in the higher-priced models.
| Rental:We offer the Trek series and MH series from Decathlon for rent at the Himachal Tripper store. The shoes are already broken in and in excellent condition. Rental shoes are kept clean and hygienic—here’s how we ensure they stay that way.
For a trek like Chandrakhani Pass, a 50–60 litre backpack is recommended. Ensure your backpack offers strong hip and shoulder support and features quick-access pockets. Check out this guide for tips on choosing the right backpack.
| Buying Tip:Wildcraft, Decathlon, and Adventure Worx are all reliable brands for trekking backpacks. While Wildcraft tends to be on the pricier side, Decathlon and Adventure Worx offer budget-friendly options that are perfectly suitable for your trek.
| Rental:The 48-litre backpack by Adventure Worx is available for rent at the Himachal Tripper store. These backpacks are custom-designed for Himalayan treks. If you don’t have your own, renting one is a convenient option.
Layering is key in the mountains. Wearing multiple layers gives you maximum protection against the elements. As the weather changes—which it often does every few hours—you can easily add or remove layers to stay comfortable and safe.
Wear one T-shirt and carry two extras. Opt for full-sleeve, dry-fit T-shirts—preferably with collars—as they protect your arms and neck from sunburn. At higher altitudes, the air is thinner and UV rays are much stronger, so sunburn can happen very quickly.
Dry-fit T-shirts are ideal for trekking—they wick away sweat, dry quickly, and are easy to wash. On a rainy day, they dry much faster than regular cotton. Round-neck T-shirts are acceptable, but collared ones offer better sun protection.
| Cotton or Synthetic? As Indians, we naturally love cotton. On the plains, where temperatures can soar to 40°C, cotton makes sense. But in the mountains, cotton takes too long to dry when wet. Instead, go for synthetic clothing—it wicks sweat quickly and keeps you dry. Just a heads-up: synthetic fabrics can develop odor faster, so carry a roll-on deodorant with you.
| Buying Tip:You can find dry-fit T-shirts at Decathlon, as well as at stores like Reliance Trends and Max. They are generally affordable and a great option for trekking.
| Pro Tip:If you tend to feel the cold easily, you might consider thermal inners. However, in our experience, layering two T-shirts often works just as well for warmth. This method also saves weight and space, since you’re already carrying the T-shirts on your trek.
The highest point on this trek is 14,065 ft. Even during mid-summer, it can get quite cold at these altitudes. You will need at least two insulating layers to stay warm and comfortable throughout the trek.
You’ll need one pair of inner thermals and either two light fleece layers or one thick fleece layer. Avoid heavy, hand-knitted sweaters—they’re bulky and weigh you down. Opt for sweaters or fleece jackets that can be easily folded into compact rolls for your backpack.
| 1 Outer Layer: For your outer layer, a padded jacket is ideal. You don’t need it to be water-resistant, but it should protect you from wind and cold. Make sure the jacket also comes with a hood for extra warmth and coverage.
| Do you need a down/feather jacket?You don’t need anything fancy—a regular padded or shell jacket will suffice. Watch this video to understand the differences and choose the right one for your trek.
| Note:Down or feather jackets are increasingly hard to find these days. Many jackets labeled as down are actually polyester-filled, designed to mimic the warmth of real down. While they perform similarly, these jackets are often more expensive than regular padded options.
| Rental:Padded jackets by Fort Collins are available for rent at the Himachal Tripper store. These jackets are custom-made for our treks, and trekkers find them excellent for staying warm, even in winter conditions.
For this trek, one to two pairs of trekking pants are sufficient. Wear one pair and carry an extra in case of rain or snow. Pants with zippered cut-offs at the thighs are especially versatile. Always choose quick-dry pants over cotton, as they dry quickly even in cold conditions.
| Buying Tip:Choose trekking pants with zippered pockets. They’re very convenient for storing your phone, handkerchief, or small snacks while on the move.
| Track pants or Trek pants?Stretchable track pants make a good backup and can even double as thermal bottoms. However, they are not a substitute for proper trekking pants, so use them only as a backup and not as your main outer layer.
These accessories are essential—you shouldn’t attempt the Chandrakhani Pass trek without them. Many trekkers wait until the last minute to buy or borrow them, but we strongly recommend starting to gather these items early.
Sunglasses are essential to prevent snow blindness. Even 30 minutes of direct sunlight on snow can cause it, because snow acts like thousands of mirrors, reflecting UV rays. Make sure your sunglasses offer full UV protection to keep your eyes safe on the trek.
| Wearing Tip: Wear sunglasses on bright, sunny trekking days, especially in open areas and meadows. On snowy sections, never remove your sunglasses until you have completely crossed the area to protect your eyes from reflected UV rays.
| Buying Tip: Opt for wrap-around sunglasses rather than ones with open sides. Even peripheral UV exposure can harm your eyes, so full coverage is important for protection on the trek.
| If you wear spectacles: If you wear spectacles, you can opt for oversized sunglasses that fit over your regular glasses (available at Decathlon). If that feels cumbersome, photochromic lenses are a great alternative. Check out this quick guide on managing sunglasses while wearing spectacles.
| Contact lens users: If you wear contact lenses, you can use them on the trek without any issues. The lens solution won’t freeze, and you’ll be able to change your lenses in your tent comfortably. Just make sure to carry enough solution to clean your fingers properly. Always wear your sunglasses over your contact lenses for extra protection. Read this article for more tips on managing contact lenses while trekking.
A sun cap is mandatory on this trek. Without one, you risk headaches, sunstroke, faster dehydration, and a noticeable drop in trekking performance.
| Tip: In the mountains, it’s a good rule to keep your head covered at all times. During the day, a sun cap shields you from harsh UV rays, helping to regulate your body temperature. In the early morning or evening, your head can lose heat quickly, so a woollen cap is essential to retain warmth.
| Pro Tip: Sun caps with flaps are a boon for trekkers—they block almost all UV exposure and protect against sunburn in every possible way. They are often more effective than sunscreen alone. A wide-brimmed sports hat also offers excellent sun protection for your face and neck.
On a trek like Chandrakhani Pass, gloves are essential—both for grip and to keep your hands warm. Choose synthetic gloves with waterproof exteriors and padded linings inside. If you can’t find this combination (rare, but possible), layer a tight-fitting fleece glove under a synthetic glove. Carrying gloves is mandatory for this trek.
Make sure your woollen cap fully covers your head. In cold mountain conditions, your head loses more heat than your hands, feet, or body, which is why protecting it is crucial—especially when the sun is low. Early mornings, late evenings, and chilly trekking days are the times you must wear your woollen cap.
Your ears are sensitive to the cold, so a woollen cap that covers your ears is essential. A balaclava is a modern alternative—it covers your head, ears, neck, and parts of your face. If you opt for a woollen cap that only covers your head, make sure to also carry a neck warmer or woollen scarf for full protection.
Take three to four pairs of sports socks and at least one pair of woollen socks. Sports socks provide cushioning and warmth. The key is to choose synthetic socks or at least a synthetic blend, as cotton socks absorb water and sweat and are difficult to dry in the mountains.
Woollen socks are great for keeping your feet warm and cozy at night. If you don’t have woollen socks, layering two pairs of sports socks works just as.
Trekkers often wonder whether to carry a headlamp or a handheld torch. A headlamp is the better choice, as it keeps your hands free for other tasks. On the Chandrakhani Pass trek, you’ll need your hands for washing dishes, pitching tents, and holding your trekking poles.
| Buying tip: Make sure your headlamp provides a wide beam rather than a narrow, focused light. On a trek, your headlamp should help you see your surroundings as well as the path ahead.
| Rental: Headlamps are available for rent at the Himachal Tripper store, making it easy to travel light if you don’t own one.
Trekking poles provide stability and balance while reducing your energy expenditure by up to 40%. On the Chandrakhani Pass trek, with its steep ascents and descents, a pair of trekking poles can make the difference between a comfortable trek and a strenuous one. While many trekkers in India use a single pole, two poles offer better balance, stability, and a faster walking pace.
| Rental: Imported side-locking trekking poles are available for rent at the Himachal Tripper store, making it convenient if you don’t want to carry your own.
On a trek, weather can change rapidly—a bright sunny morning can turn into a downpour within minutes. Carry a poncho or rain jacket to stay dry. A poncho is a large rain cover with openings for your head and arms, and it’s highly effective because it protects both you and your backpack. It’s also extremely lightweight, adding almost no extra weight to your gear.
| Pro Tip: Rain jackets are more streamlined and less cumbersome than ponchos, but they tend to weigh a little more. Rain pants aren’t necessary—your quick-dry trekking pants will dry fast even if they get soaked.
| Rental: High-grade ponchos are available for rent at the Indiahikes store.
Your backpack is your lifeline on a trek, carrying all your dry clothes and warm gear, so it must stay dry at all times. Most modern backpacks come with built-in rain covers. If yours doesn’t, make sure to protect it with a rain cover by either:
| Pro Tip: It’s a good practice to organize your clothes, accessories, and other items in plastic covers inside your backpack. This way, even if your backpack gets wet in the rain, your belongings remain dry and protected.
In your daypack, carry essentials such as water bottles, rainwear, emergency medicines, a headlamp, snacks, and a warm layer. Your main backpack, which holds most of your gear, will be accessible only at the campsites.
A daypack is a smaller backpack, usually with a 20–30 litre capacity. Laptop bags are not suitable as daypacks, so avoid using them on the trek.
Keep your toilet kit light and carry only the essentials: toothbrush, toothpaste, small soap, toilet tissue, a small moisturizer, lip balm, and roll-on deodorant. You won’t be able to bathe during the trek, so avoid overpacking soaps and shampoos.
| Pro Tip: Carry miniature-sized toiletries—you won’t need more than that. If you’re trekking in a group, consider sharing items like toothpaste to save space and weight.
| Pro Tip: Avoid carrying large toilet rolls—the smallest size is more than sufficient for a trek like Chandrakhani Pass.
| For Women: If your period coincides with your trek, don’t worry—you can use pads, tampons, or menstrual cups without any issues. Toilet tents are available for changing. Carry ziplock bags to pack out your menstrual waste—never leave it behind in the mountains. Watch this video to learn the proper way to dispose of sanitary waste while trekking.
Carry a lunch box, a mug, and a spoon, and make sure your lunch box is leakproof. You are expected to wash your own cutlery. Many trekkers assume that Himachal Tripper will clean their utensils, but when cutlery is washed in a shared system, it increases the risk of germs and bacteria, which can lead to stomach problems.
| Pro Tip: Carry stainless steel cutlery and avoid fancy, high-grade plastic utensils. Stainless steel is much easier to clean in cold water, grease comes off easily, and it ensures maximum hygiene during your trek.
| Carry two 1-litre water bottles or a 2-litre hydration pack. On the Chandrakhani Pass trek, you’ll be trekking for around 6 hours each day, so staying hydrated is essential. If one of your bottles is a lightweight thermos, it can be used to carry warm water for cold days, early mornings, or late evenings.
| Rental: You can rent lightweight thermos flasks from the Himachal Tripper store, making it easy to carry warm water without adding extra weight to your backpack.
Carry 3–4 old plastic covers to store your used or wet clothes. Reuse old plastic bags instead of buying new ones to keep your trek eco-friendly.
These are documents required for legal purposes by Indiahikes and the forest department. Without any of these, you will not be allowed to trek.
Note: Himachal Tripper has a panel of doctors who can assist you with your medical certificate. They are available for online consultations. To get in touch, write to info.himachaltripper@gmail.com —they usually respond within 24 hours.
Consultation fee: Rs 300
Carry these medicines with you, easily accessible at all times. Do not take any medicine unless you have consulted your trek leader.
Our trek leaders carry a high altitude medical kit with them which also consist of Life Saving Drugs. If there is an emergency our trek leaders know how to tackle it. Meanwhile, contact your trek leader before consuming any of these medicines listed here.
Pro Tip: We’ve found that trekkers rarely end up using these medicines, but they are still mandatory to carry. At the end of the trek, please donate any unused medicines to your Trek Leader. Some of these medicines are distributed to villages along the trek, while others are added to the Himachal Tripper medical kit for future treks.
Reporting Time: 11 am | Pick Up Point: Beas Bridge, Manali
Pick-up will be arranged from Beas Bridge, Manali to Himachal Tripper Jungle Line Campus at 11 am. Collect your rentals, sort out the cloakroom and attend a detailed trek briefing. If time permits, go on short hikes around the campus or visit the historic town of Naggar.
The cost of this pick-up is already included in your fee if you have booked Himachal Tripper transport for this trek. If you have not opted for Himachal Tripper transport, you'd need to reach the Himachal Tripper Jungle Line Campus on your own.
Shimla Sightseeing (Tour 1): 13 Kms Formerly abode of Lord Kitchener commander - in - Chief. A beautiful touristspot with spacious .
Advanced Studies (Tour 2): Viceregal Lodge now know as indian institute of Advanced Studies also called as Rashtrapati Niwas .
Shimla Temple (Tour 3): At the top of the famous Jakhu hill is located the famous Jakhu Temple of Shimla.
Shimla Kufri (Tour 4): 22 kms Among grant Deodars & enduulating mounds, lies a nine hole golf course. One of india's.
Shimla Naldehra (Tour 5): 22 kms Among grant Deodars & enduulating mounds, lies a nine hole golf course. One of india's.
kushala temple shimla(Tour 6): Kushala Mahavir Mandir, Shoghi. Shimla Come and get blessed This is a very old Temple and a holy place with great significance for all Hindu travellers.
Contact us